Integrating SendGrid as your email service provider is a quick and efficient way to enhance your email communications. Before connecting it to your account, a few preliminary steps must be completed within your SendGrid account. This guide walks you through the process of generating an API key, configuring SMTP settings, and successfully linking SendGrid to your platform for seamless email delivery.
Getting Started
Before integrating SendGrid with your account, you will need to create an API Key. To do this, log in to your SendGrid account, navigate to "Settings" on the left navigation bar, and then select "API Keys". Click on the “Create API Key” to generate a key.

Setting up API Key
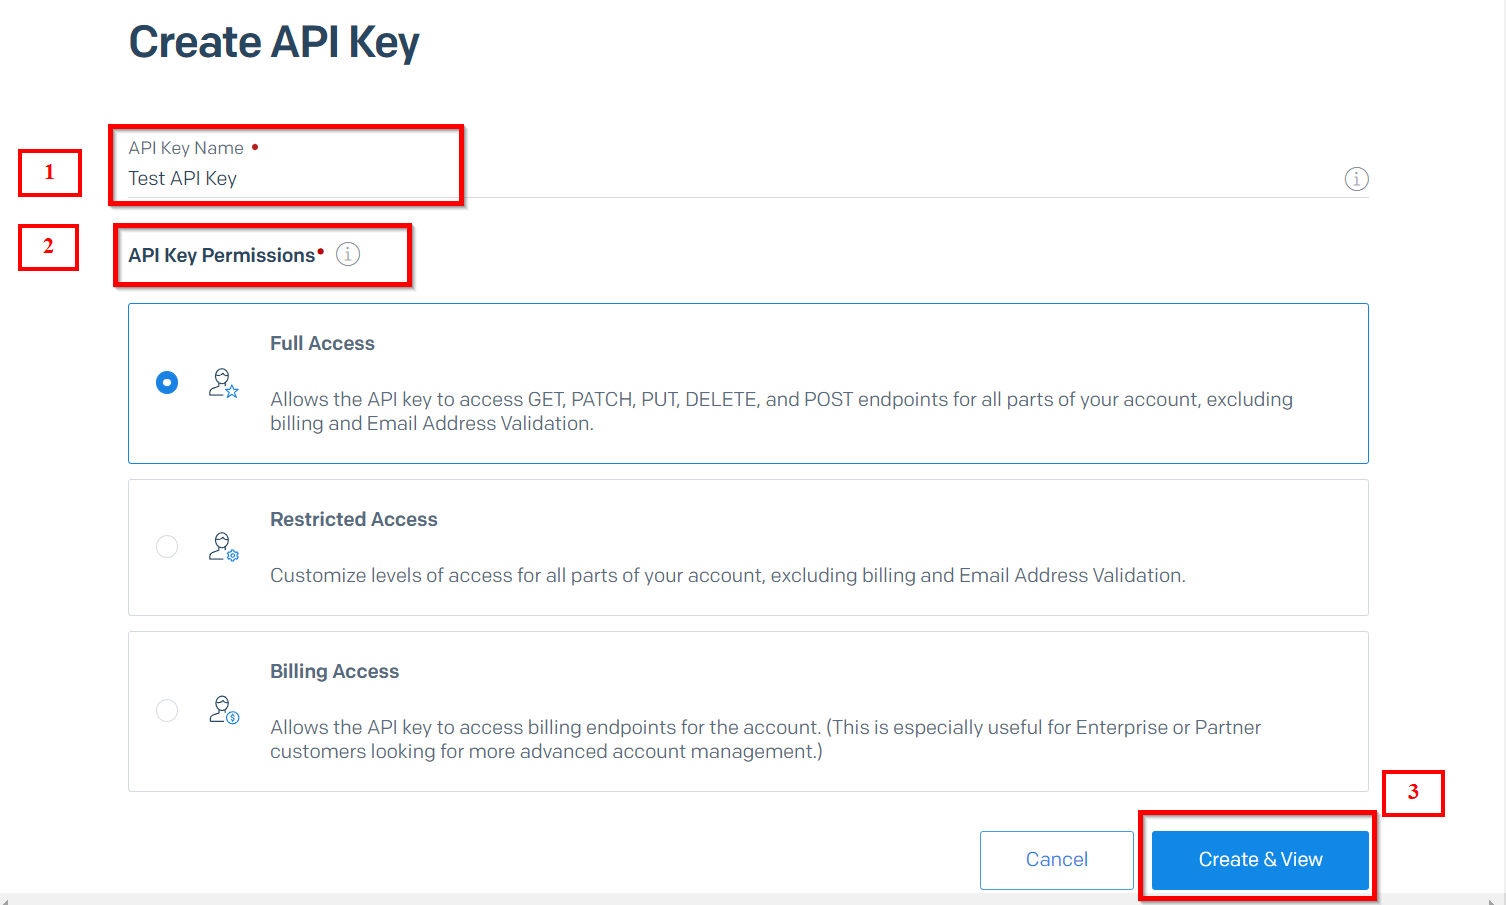
Give your API key a name, and set the API Key Permissions. If you have chosen Restricted Access or Billing Access, specify the permissions for each category. For more details, refer to API key permissions.
Once done, click "Create & View."
Additionally, you can enable Two-Factor Authentication (2FA) and complete the Sender Authentication process within your SendGrid account for enhanced security and reliability.
Copy API Key
The API key will serve as the password for the SendGrid connection. Click on the key to automatically copy it in full and ensure you store it securely. For security purposes, avoid embedding the API key directly in your code or storing it in any public repository.

Integrating SendGrid
After copying the API key from your SendGrid account, navigate to the email services section within the settings of your platform. Click on the "Add Service" option to proceed with the setup.

Click on the SMTP provider dropdown and select SendGrid.

Configuring SMTP Settings
A popup modal will then appear, allowing you to fill out the required fields to establish the connection.
- Username: Optionally, enter the username as “APIkey”
- Email Address: Enter the email address associated with your SendGrid account.
- Password: Paste the API Key copied from the SendGrid account.

Save
Once you have confirmed that the information was inserted correctly, save the settings to finalize the connection.

Once connected, don’t forget to set SendGrid as your default provider (if required) to take full advantage of its robust email capabilities!
Was this article helpful?
That’s Great!
Thank you for your feedback
Sorry! We couldn't be helpful
Thank you for your feedback
Feedback sent
We appreciate your effort and will try to fix the article