A dedicated sending domain allows you to send emails that appear to be coming from your brand, and this can help you maintain a better reputation with email services.
By default, all emails sent from our platform will show the name of our email-sending servers in the "sent on behalf of" or "sent via" email headers:
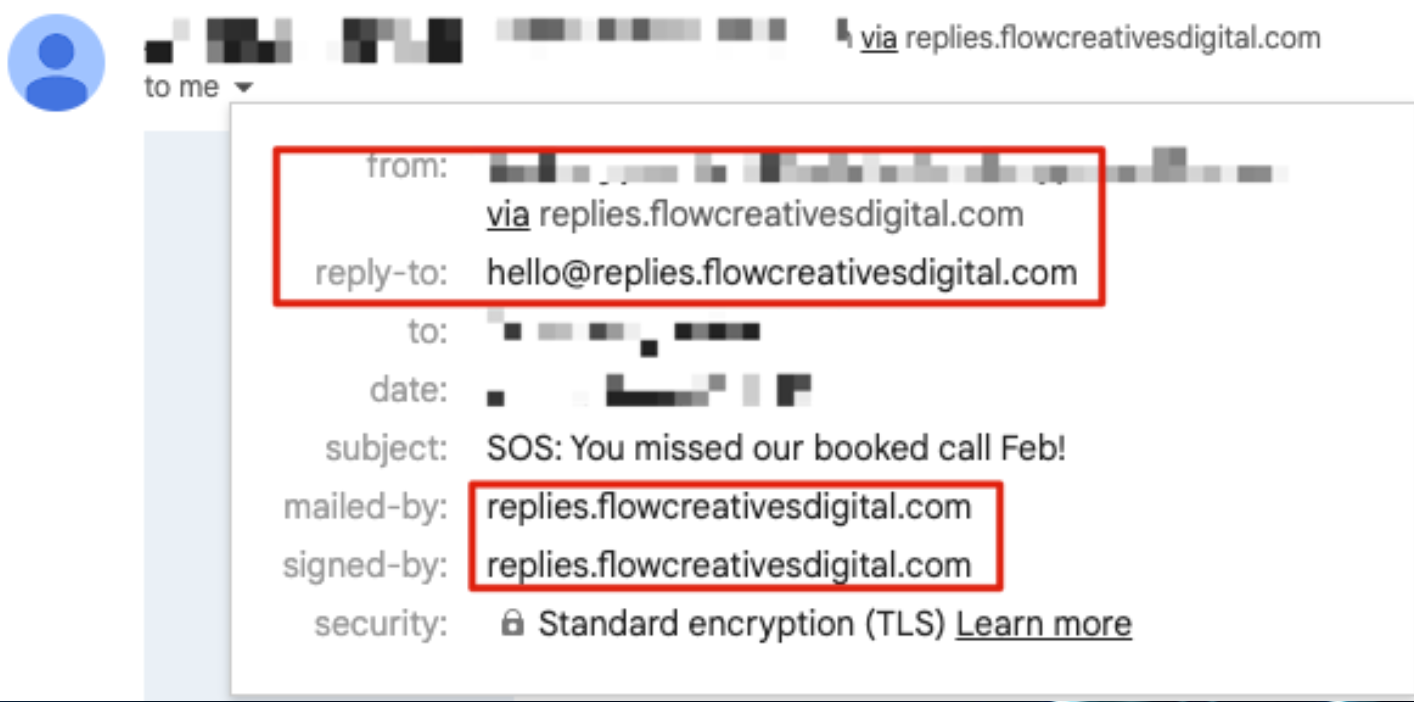
When you set up your own custom mail server domain, you will see a different "mailed- by", "sent on behalf", or "sent via" field.
It would be best if you used a unique subdomain that is not used for any other purpose. A subdomain is a secondary part of your root domain. For example, if your dedicated sending domain is hello@mg.yourbrand.com, your subdomain would be the “mg” portion.
Create a Dedicated Sending Domain
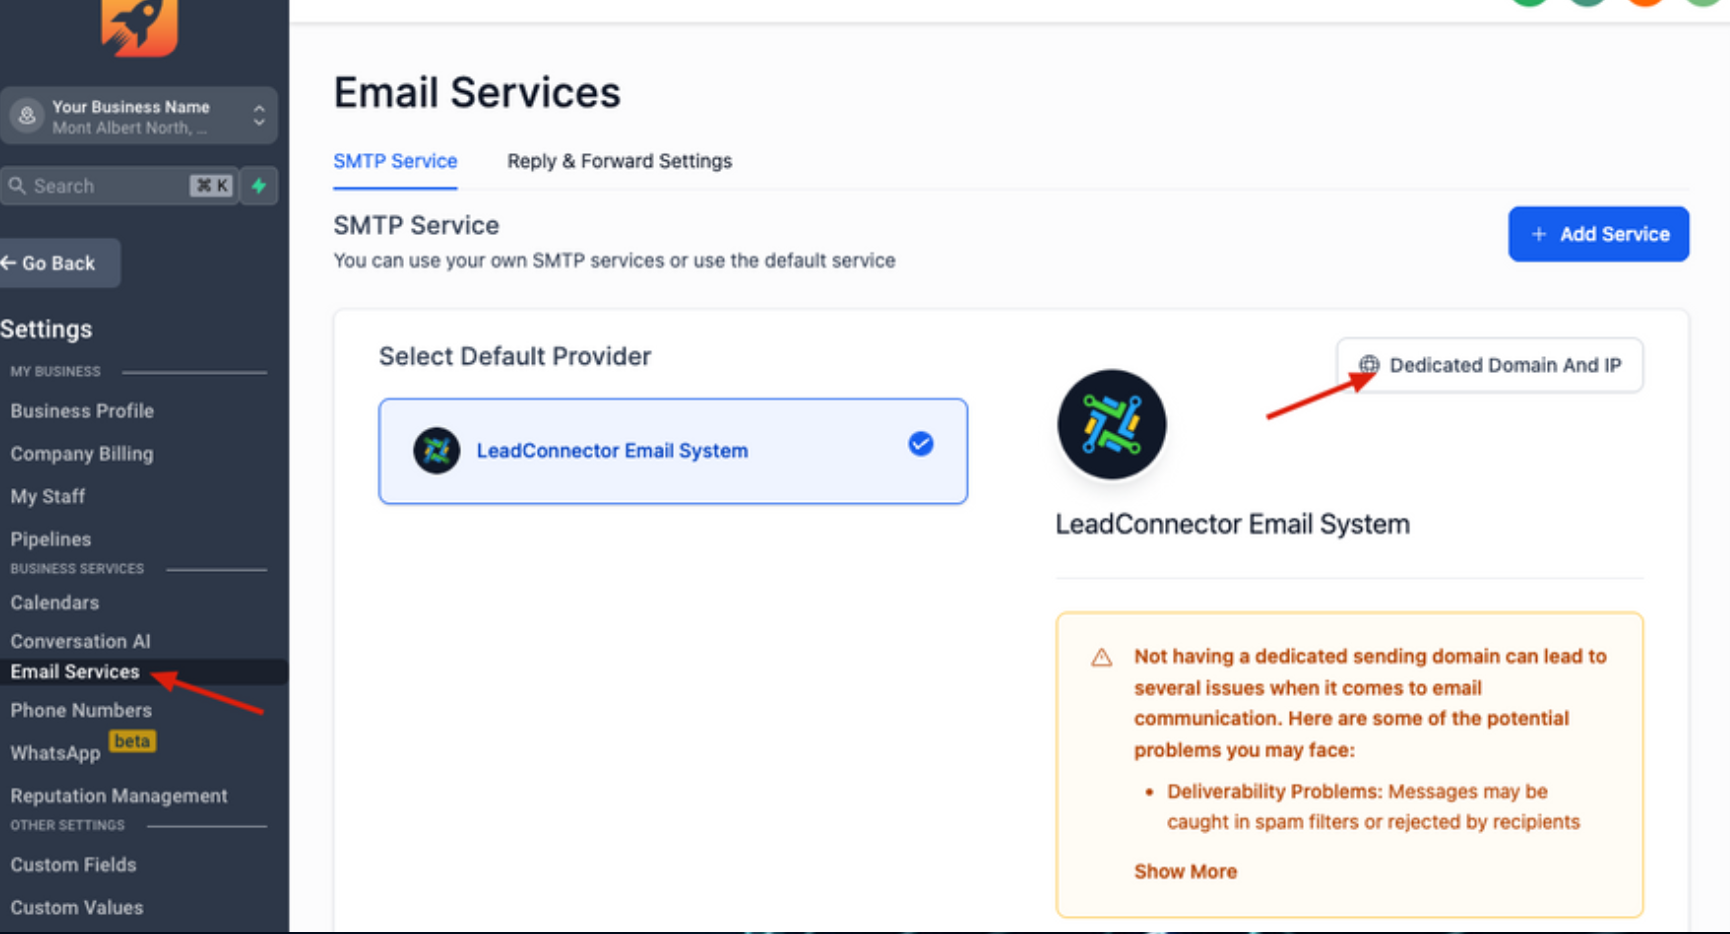
- Navigate to Settings > Email Services
- Click the 'Dedicated domain' button
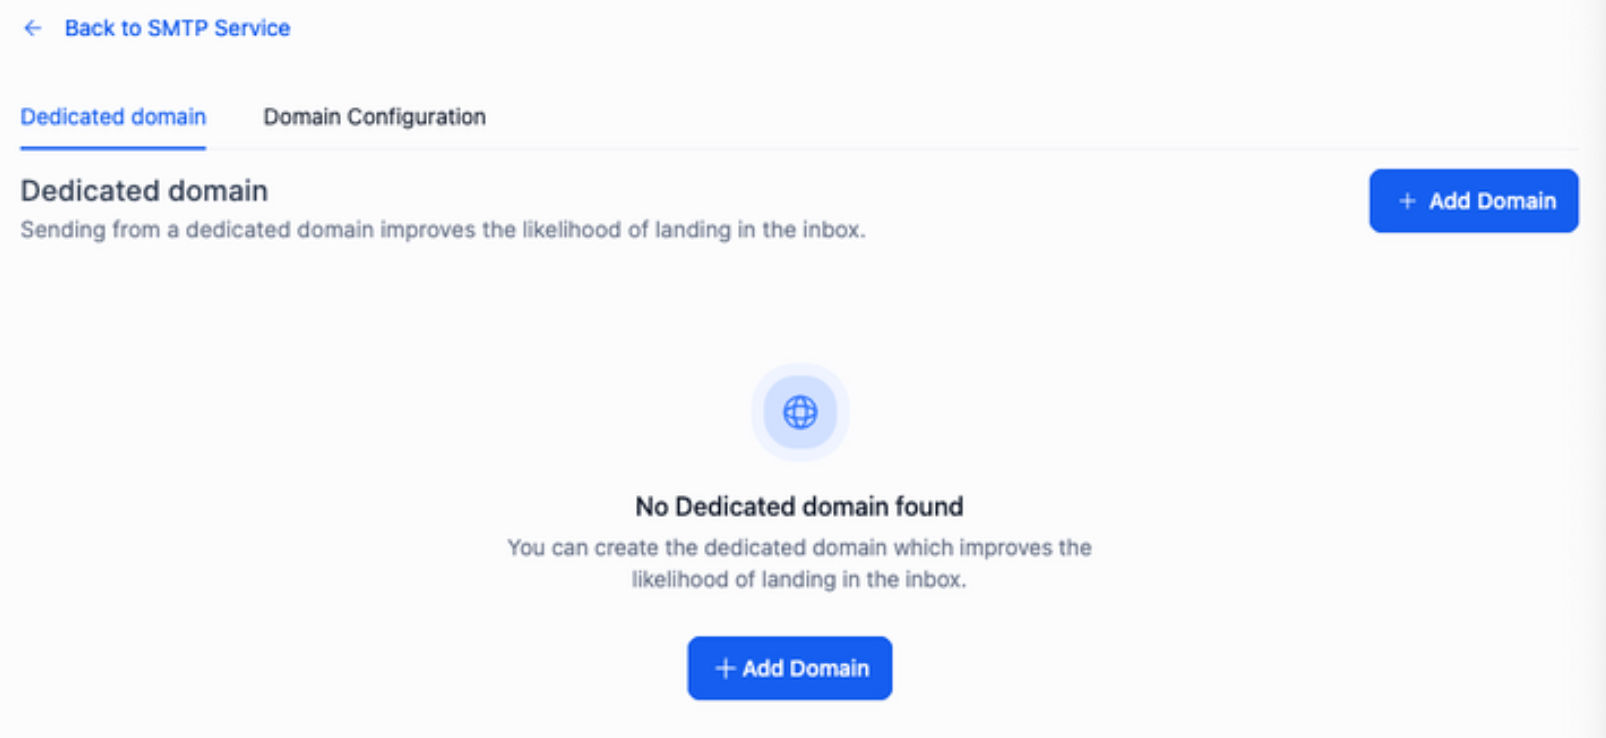
- Click + Add Domain
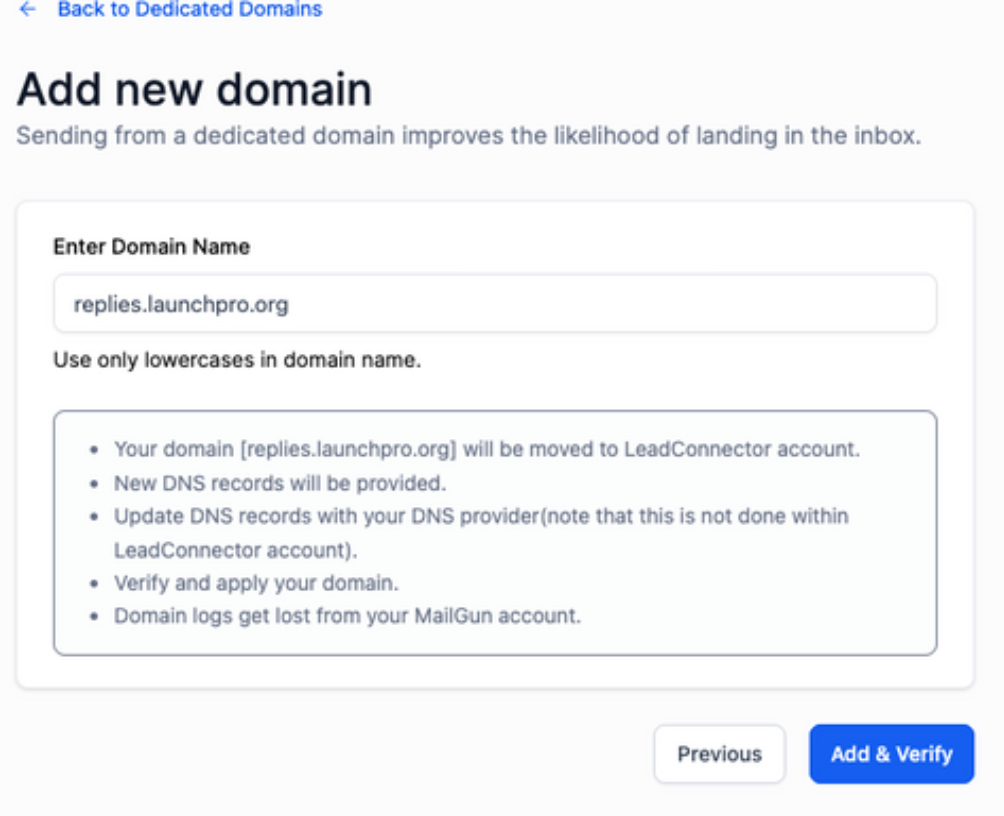
- Enter your subdomain then click Add & Verify.
- Add the domain details provided in the system to your DNS manager.
- Verify Domain and Apply your new DNS records to your company’s DNS provider’s platform to activate the sending domain. Every domain provider will have a slightly different method of doing this.
Note: This might take 5 seconds to 48 hours to propagate, just click Verify records until it’s successful.
Was this article helpful?
That’s Great!
Thank you for your feedback
Sorry! We couldn't be helpful
Thank you for your feedback
Feedback sent
We appreciate your effort and will try to fix the article