How to Use the Email Builder for Email Templates
When using the email builder, an email template is a preset layout where you can insert image, video, and text elements to create a customized template for future emails.
We recommend to only use placeholder text and custom values when setting up an email template, in the builder. Unique and customized text should be added once you are sending out an email campaign (that used the template as its foundation).
We recommend to only use placeholder text and custom values when setting up an email template, in the builder. Unique and customized text should be added once you are sending out an email campaign (that used the template as its foundation).
Part 1: Starting from a Blank Template
- Navigate to Marketing > Emails > Email Templates
- Click on "+ New" to create your new template
- Select Blank Template
- Select Design Editor
Note: There are pre-made template options to choose from and you can also create a new template from a pre-existing one in your account.
Part 2: Understanding the Builder
- You can edit the default template title at the top of the builder.
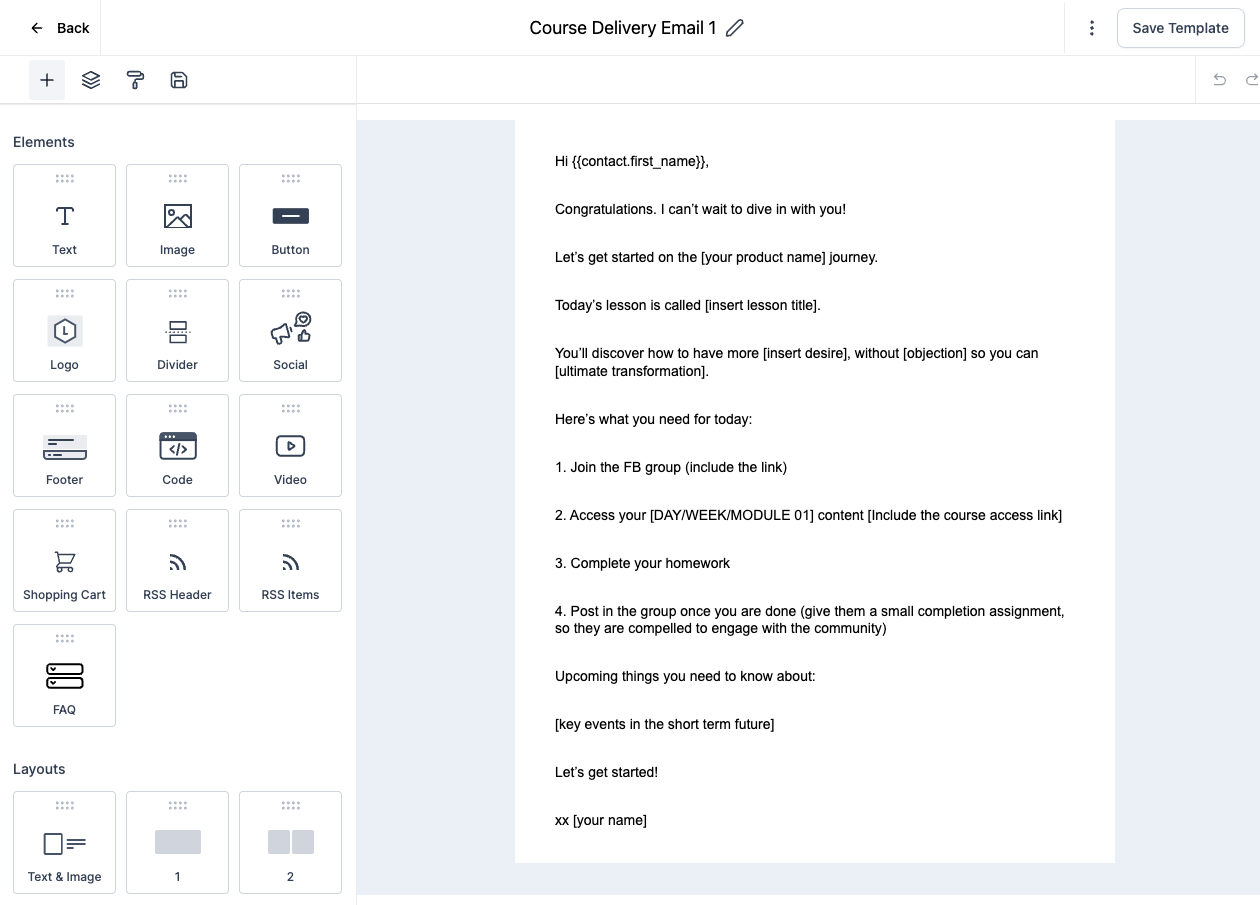
- On the left side of the editor, you will see all the Content Elements.
- These elements are:
- text, image, button, divider, social, footer, code, video, shopping cart, RRS Header, and RSS Items.
- In the Layouts section, you can add rows, with a certain number of columns.
- On the left side, there is also an Appearance tab.
Inside this tab, you can change the background color, body color, image of the background, button, divider settings, add Custom CSS, and Mobile Formatting.
- On the right side of the editor, you can see 3 dots. Here is where you can test your email, preview the template, see the version history and adjust the settings of the template.
- The Save button is located on the top right. This will save your template and all the last changes made.
Part 3: Using the Builder
- By default, the template will have a text element that says “Start from scratch”
You can click on that text to edit, but you can also delete it by hovering over the element. This action will open the element options, and you can click on the trashcan to delete.
- To customize your editor, you need to first grab a layout (choosing the amount of columns in that section), then drag and drop it where you want that section to be within the email.
- Then, you can grab the element you want to add, then drag and drop it over this layout.
- When you do that, the element settings will show up on the left side of the screen so you can edit the element as needed.
- You can add additional layouts and elements as needed.
If you are struggling to come up with new designs for your email template, feel free to take advantage of our premade templates for inspiration or a jumping off point for your own emails.
How to Send a Regular Email Campaign
- Head to Marketing > Emails > Campaigns > + Create Campaign
- Select the Email Template which you would like to create a Marketing Email Campaign
- Design your email and content by adding all the necessary elements
- You can save your email campaign and edit it if needed later until you are ready to send it.
- Click on “Send or Schedule”
- Fill out the information in the To and From section
- Add your subject line in the Subject section
- Select the option to Send Now or Schedule (Depending on when you want to send the email, now or later)
- If you choose the schedule option, you will need to add the date and time (please note that the email will be sent in your account's timezone)
Note: You can reschedule your campaign one hour before the execution date/time. To do this, click on the reschedule button and set the date/time of the campaign.
You can also send the campaign via email as a test. This will help you to see how your email will be seen by your leads.
Click on the 3 dots on the left side of the Save button and click on Test Email. Add the details and click on “Send Test Email”.
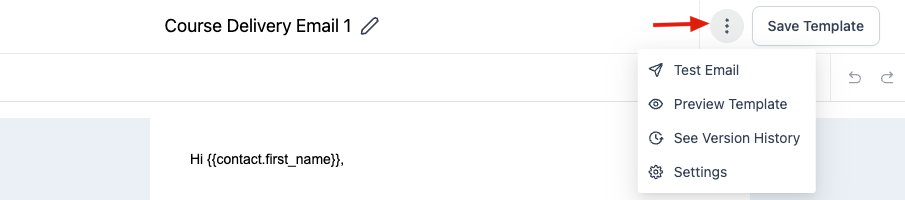
Note: You can restore older versions by clicking on the 3 dots next to the Save button. It will show you the dropdown option to see the version history and restore the older version.
Was this article helpful?
That’s Great!
Thank you for your feedback
Sorry! We couldn't be helpful
Thank you for your feedback
Feedback sent
We appreciate your effort and will try to fix the article