Manually Add a Contact
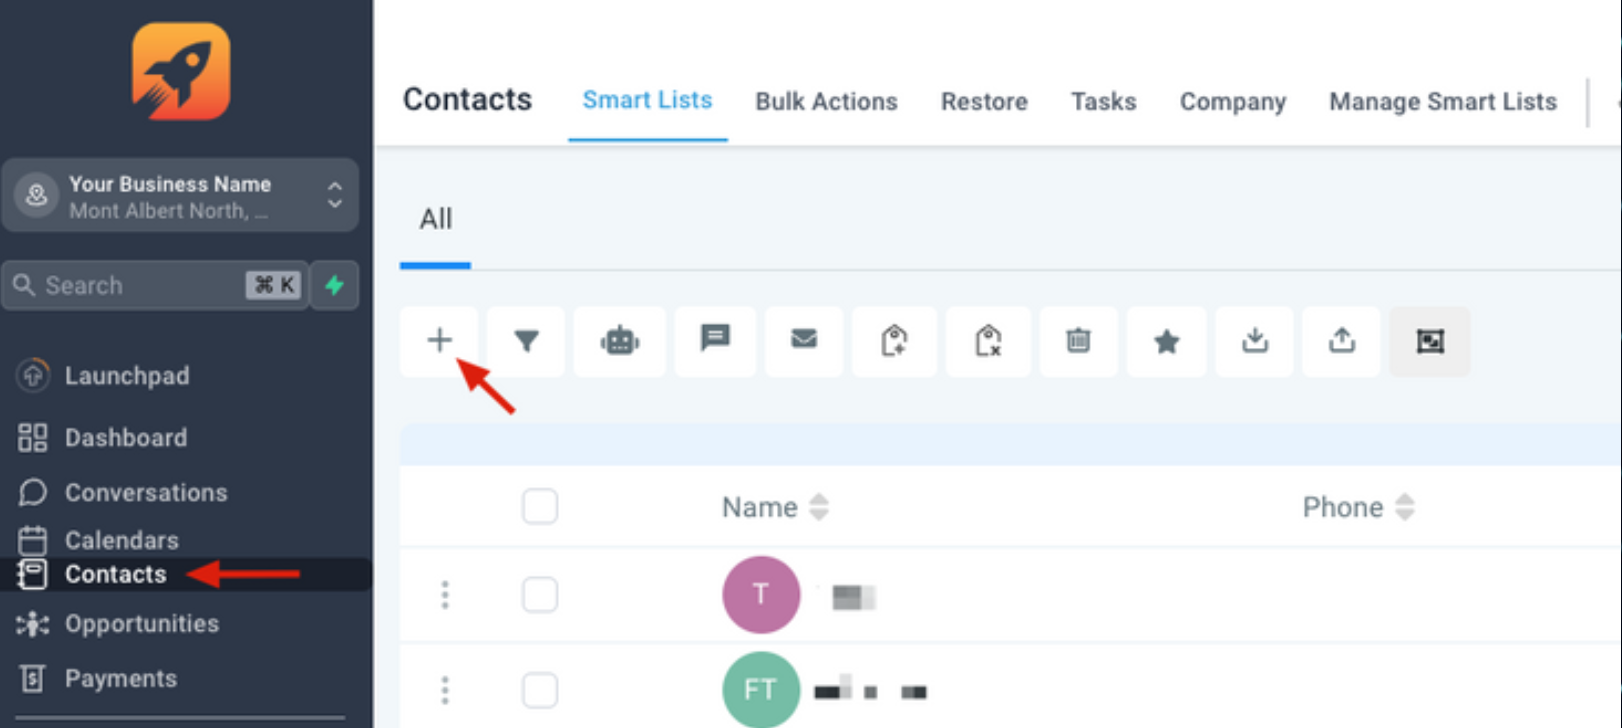
Select Contacts > Click the + icon > Fill out the details > Click Save
How to Import Contacts
You need a .csv file with the contacts you want to import.
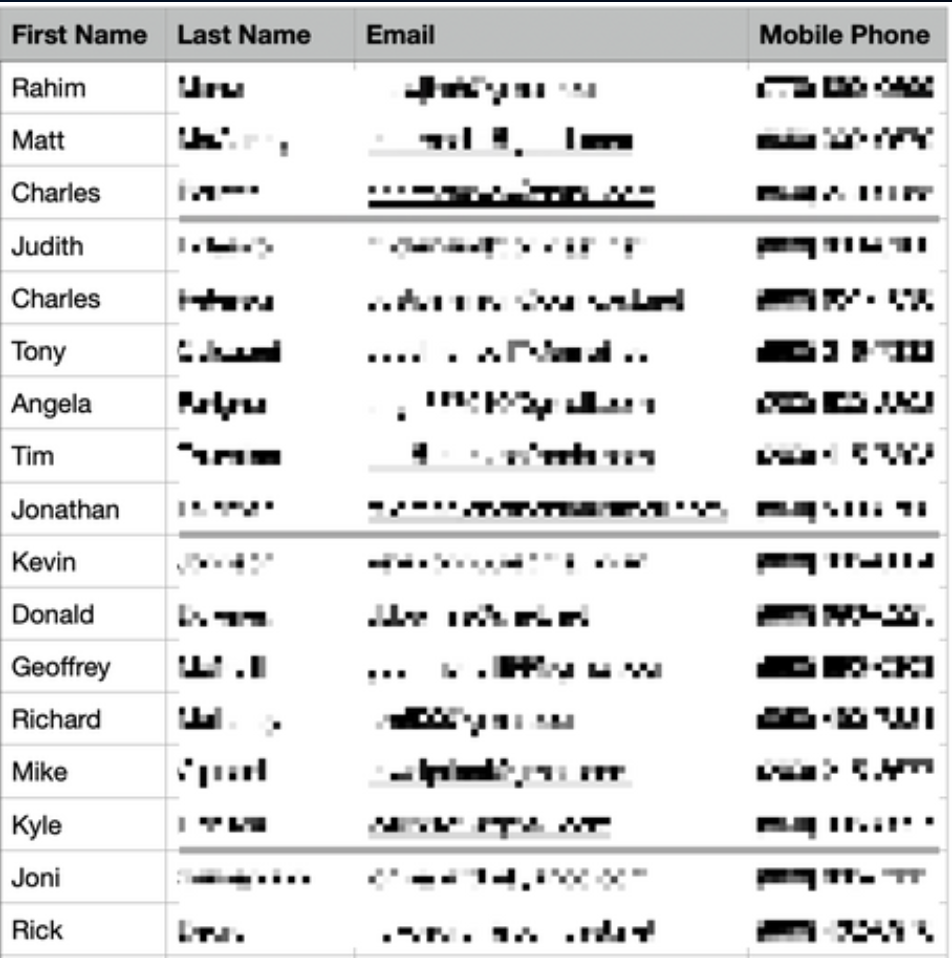
Step 1: Prepare your .csv File
- Row 1 of the file should have essential headers such as ‘first name’, ‘last name’, ‘email’, ‘phone’, ‘additional phones’, ‘address’, ‘tag’, and so forth.
- When adding multiple phone numbers for a single contact, list them in the "additional phones" column. This feature allows you to manage multiple phone numbers seamlessly.
- Format phone numbers correctly. If a "+" sign is required, add an apostrophe at the start (e.g., '+191668128779').
- Avoid using File Upload and Signature Fields in the import.
- For DND columns, remember that contacts will be set to DND for all channels unless specified otherwise through workflows and tags.
- Clean your list and check for duplicates before importing. This is crucial for maintaining data integrity and avoiding deliverability issues.
Step 2: Import your contacts
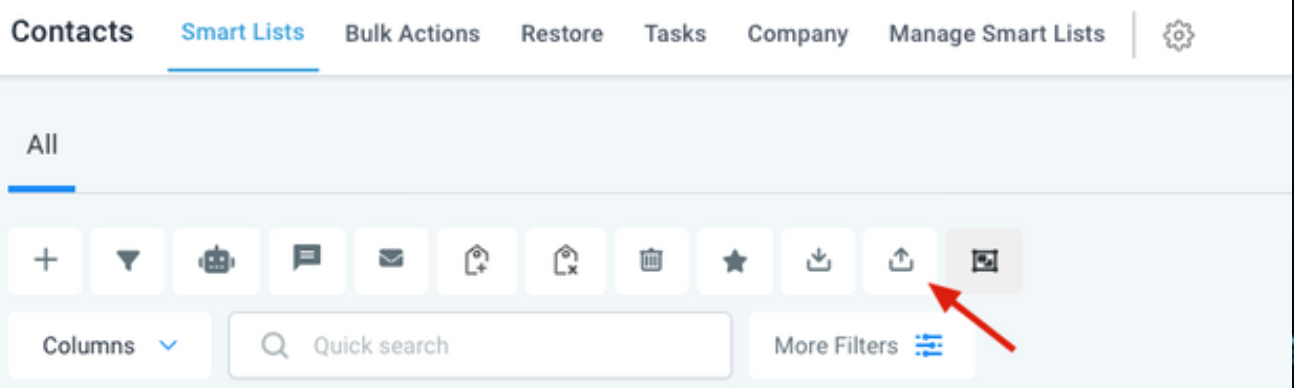
- Click the import icon
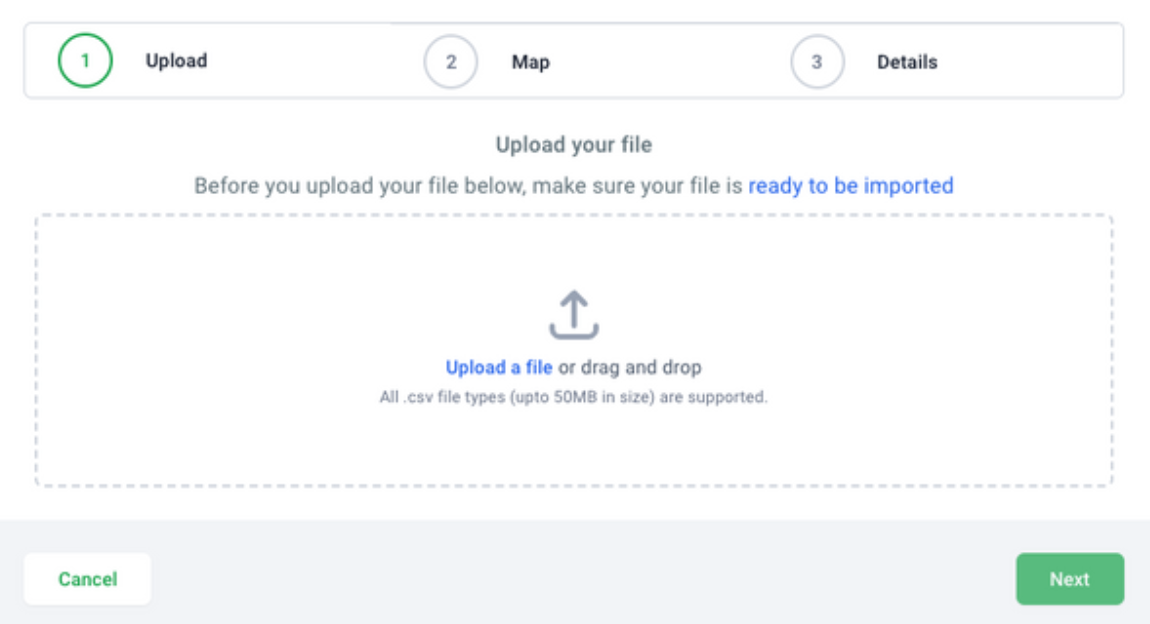
- Click “Upload a file” or use drag- and-drop.
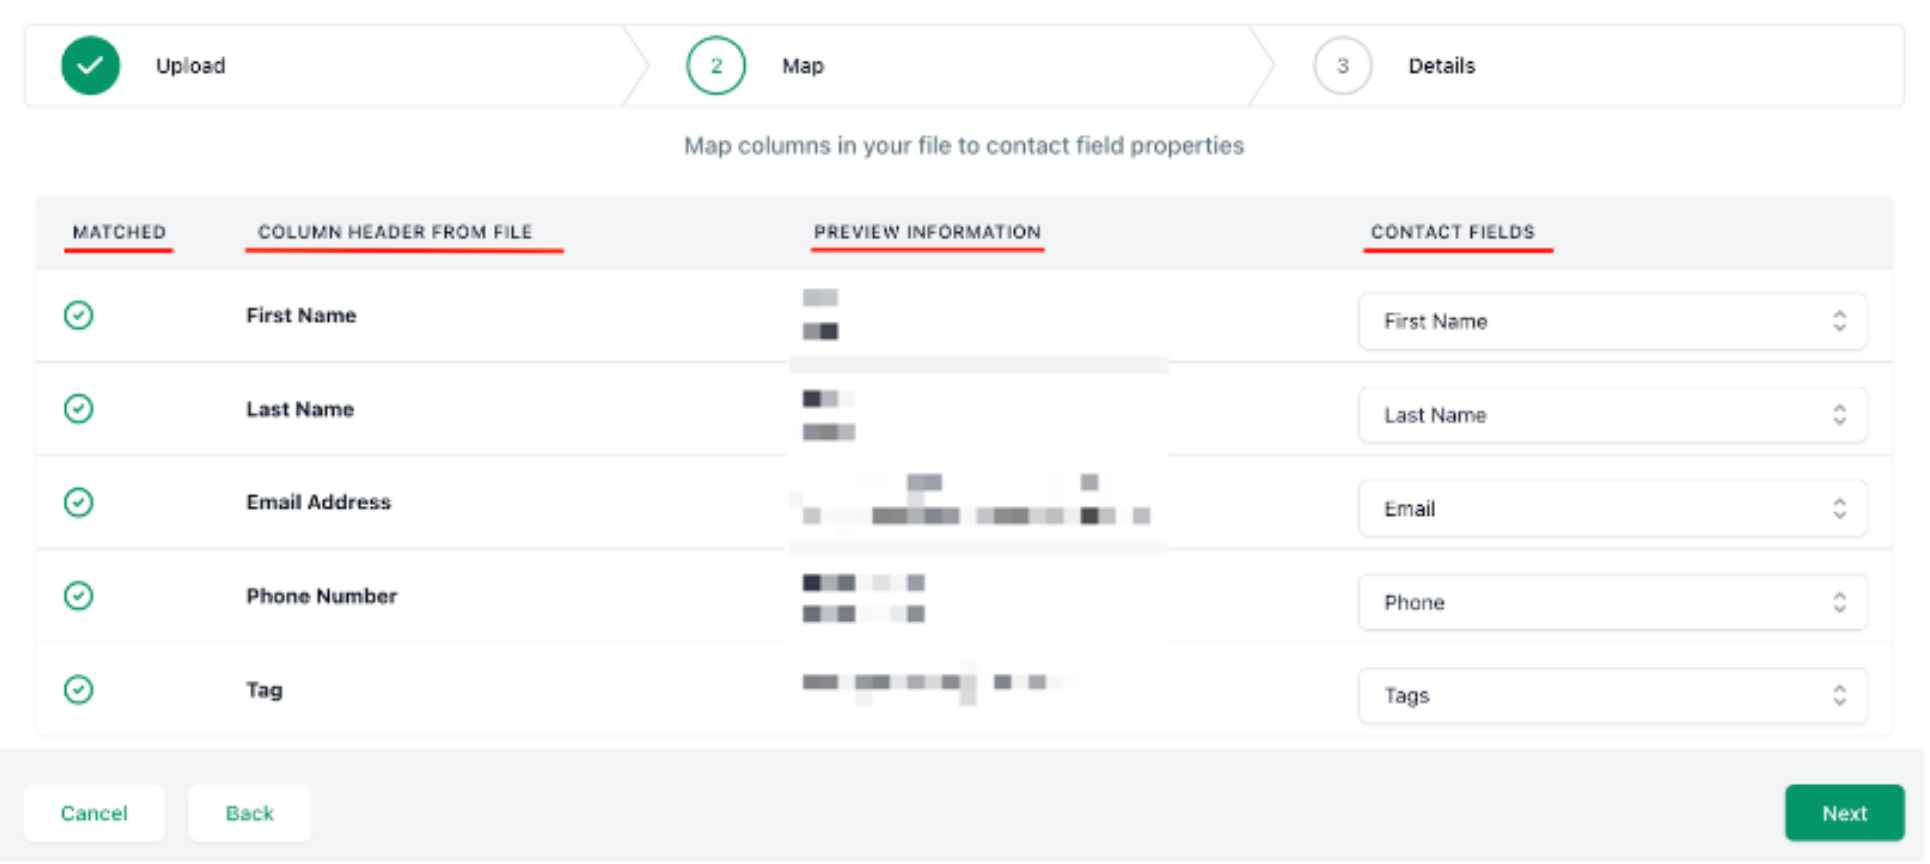
- Map fields to specify how the data will fit into LaunchPro’s fields.
- A green check indicates a ready-to-import field.
- "Column Header From File" denotes which .csv column gets imported.
- "Contact Fields" indicates the target field in LaunchPro. Most general fields are automatically recognized. Manual mapping might be necessary for custom fields or unconventional headers.
- The "Additional Phones" column can be mapped for importing multiple phone numbers. Separate them using commas, slashes, or semicolons alongside the primary “Phone” number column.
- For multiple emails, separate them and map them to the "Additional Emails" field.
- Map fields to specify how the data will fit into LaunchPro’s fields.
- A green check indicates a ready-to-import field.
- "Column Header From File" denotes which .csv column gets imported.
- "Contact Fields" indicates the target field in LaunchPro. Most general fields are automatically recognized. Manual mapping might be necessary for custom fields or unconventional headers.
- The "Additional Phones" column can be mapped for importing multiple phone numbers. Separate them using commas, slashes, or semicolons alongside the primary “Phone” number column.
- For multiple emails, separate them and map them to the "Additional Emails" field.
- Proceed to tab 3.
- Assign an import name or let LaunchPro default to a date-time format. Opt to create a “Smart List” for these contacts, if desired.
- Under the “Advanced” tab, you can:
- Decide on a strategy for duplicates.
- Add tags or decide the criteria for identifying duplicates. Activate the “Add to Workflow/Campaign” option if needed. Validate emails (charges might apply).
- Finalize by clicking 'Submit'.
Step 3: Validate the Import
- Refresh the Contacts page.
- Navigate to Contacts > Bulk Actions to verify the import's status and details.
How to Create and Edit Pipelines
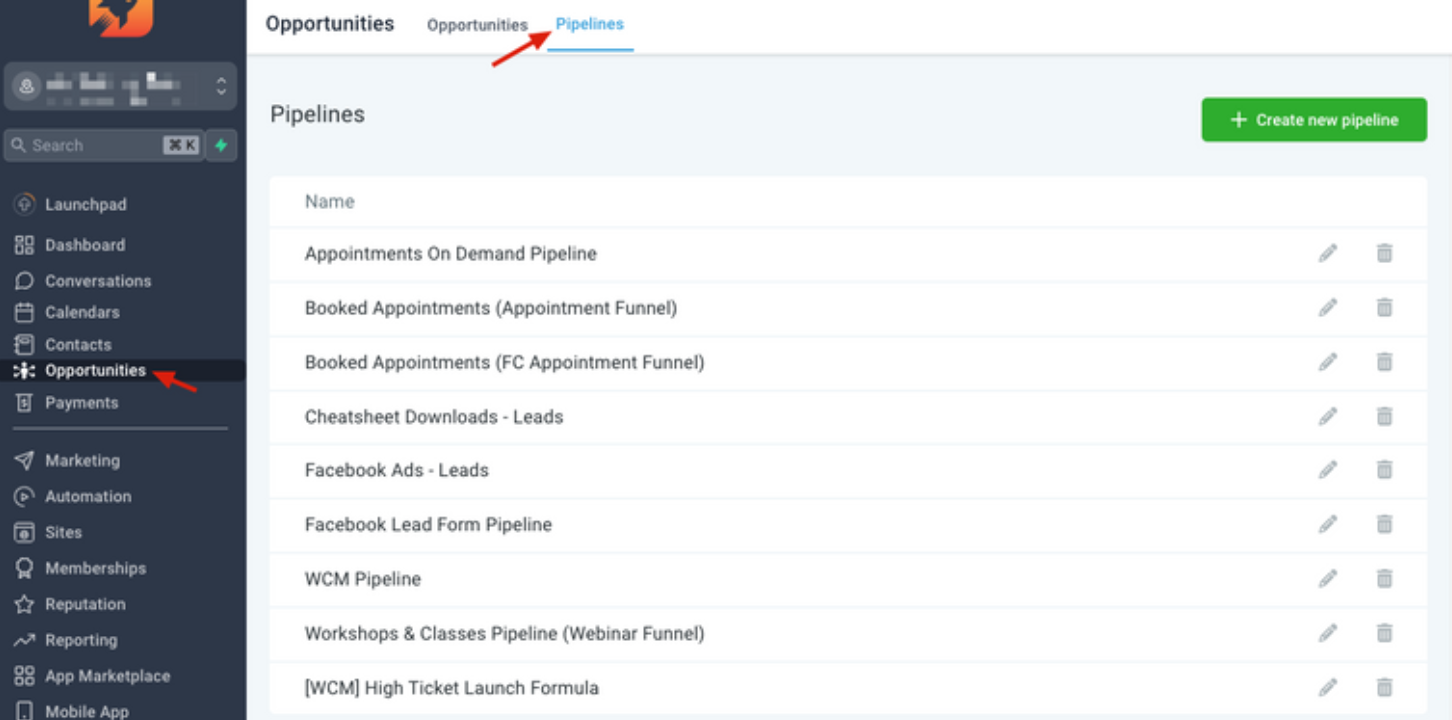
- Navigate to Opportunities > Pipelines
- Here you’ll see a list of all your existing pipelines.
- You can click the Edit or Delete icons to make changes or delete a pipeline.
Adding a New Pipeline
- Click the +Create new pipeline button
- Fill out the information in the popup window.
- Give the pipeline a name, add stages, and choose the visibility.
- NOTE: you can determine whether or not each individual stage is visible in the pie chart and funnel chart, as well as choose if the entire pipeline as a whole is visible or not.
- Using the arrows next to each stage, you can modify the order.
- Continue adding as many stages as you’d like.
- Save to confirm your changes.
- Now this newly added pipeline will appear on your Pipelines page.
- You can click the edit icon to make any additional edits.
Opportunities
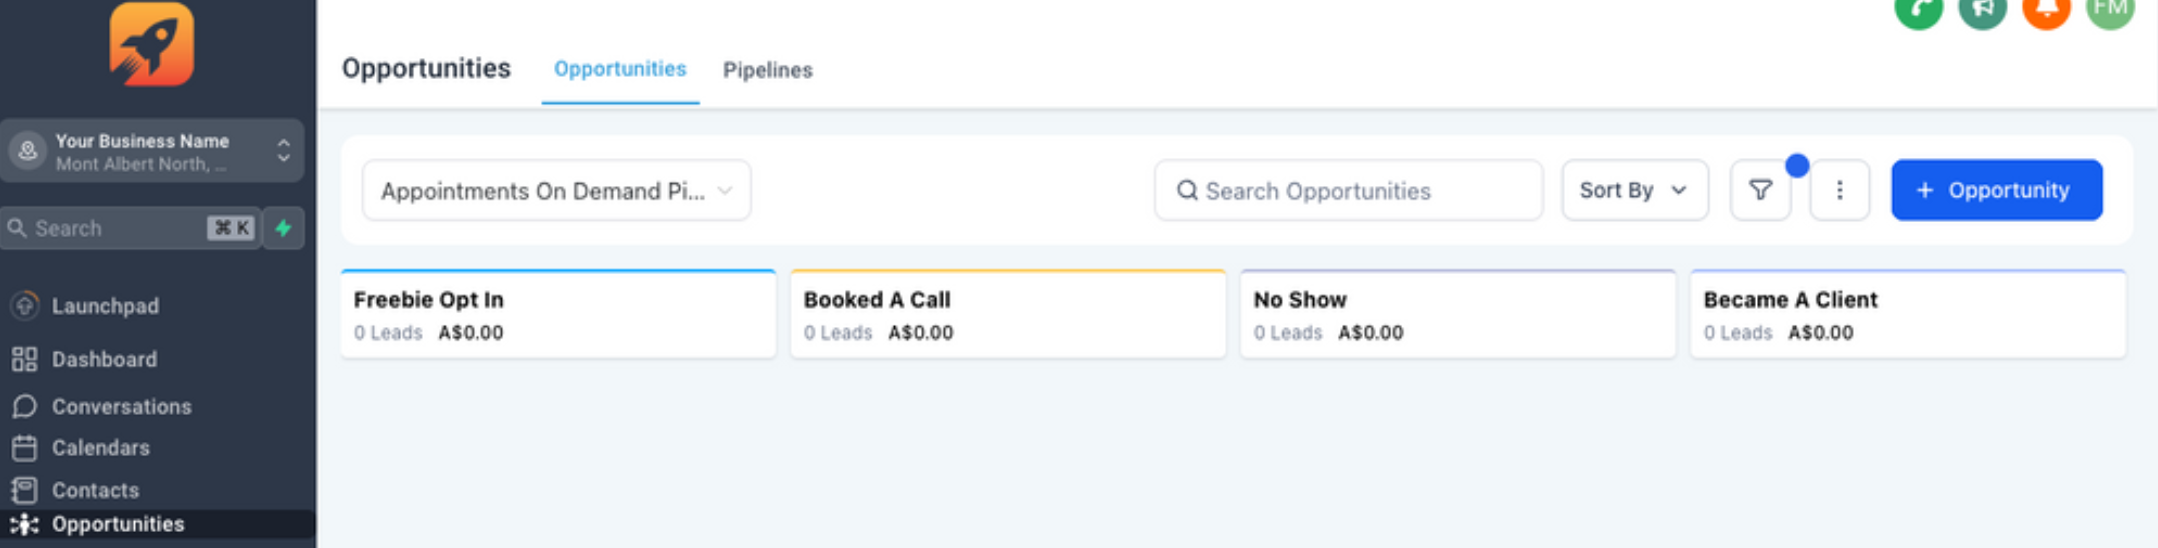
Here is where you can see all your opportunities (which are your leads), and see in which stage of your pipeline they are right now.
Part 1: Filtering Opportunities
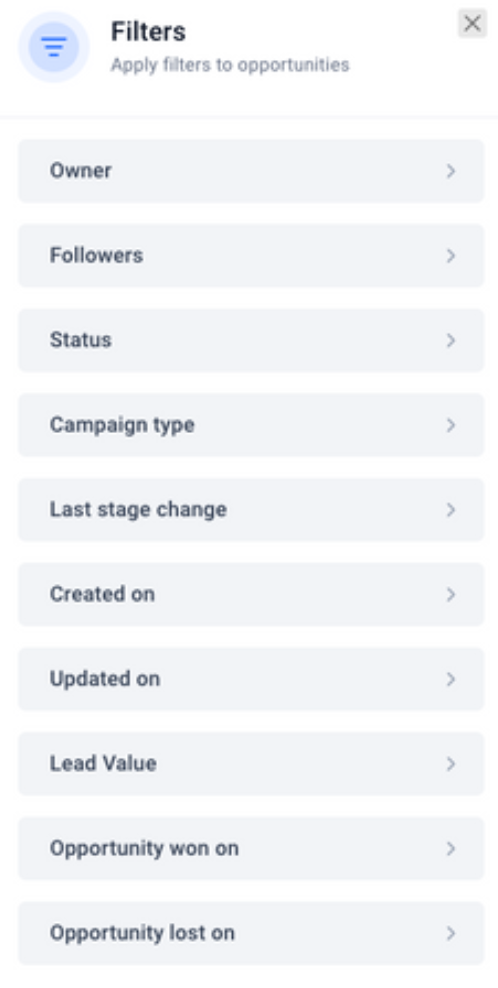
- You can filter your opportunities by: Owner, Status, Campaign Type, Last Stage Change, Created on, Updated on, Lead Value, Opportunity Won On, and Opportunity Lost On.

- You can search for opportunities
- You can select a pipeline
- You can Sort by Date Added in an ascending/descending option
- You can select multiple filters by pipeline, owner, and campaign and toggle “AND” or “OR” relationships with them
- With the menu dots, you can export and include additional information: Task, Note, Company Name, Calendar Event, Tags
Part 2: How to Add an Opportunity
- Click on the "+ Opportunity" button next to the filters to create your new opportunity.

Part 3: Inside an Opportunity Card
This information will contain:
- Their contact information: Name, email, phone, tags, and company name.
- The opportunity information: Pipeline, the stage, their status, the lead value, the owner of this opportunity, and the source.
- You can also see information on when was the opportunity created, and from where was it created.
- Checkbox for hiding empty fields
- Book/Update Appointments
- Tasks
- Notes
- Add/Manage Opportunity custom fields
Was this article helpful?
That’s Great!
Thank you for your feedback
Sorry! We couldn't be helpful
Thank you for your feedback
Feedback sent
We appreciate your effort and will try to fix the article