The Communities feature is a comprehensive tool provided that enables the creation and management of online communities. It is a hub for discussion, learning, networking, and knowledge-sharing.
Set Up and Customize your Communities
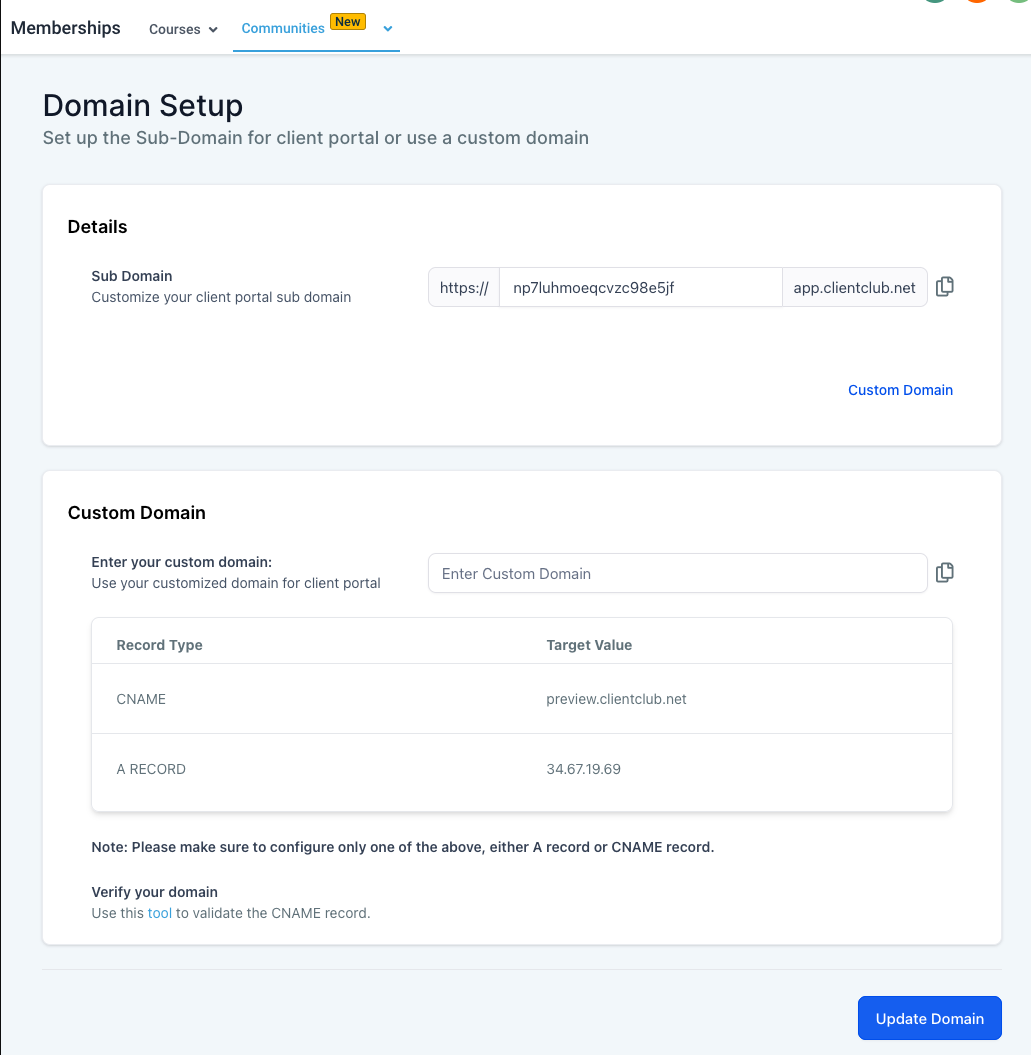
Add a custom domain - Go to Memberships → Communities → Settings or Sites → Client Portal → Domain Set Up
Enter your Custom Domain → Click Update Domain
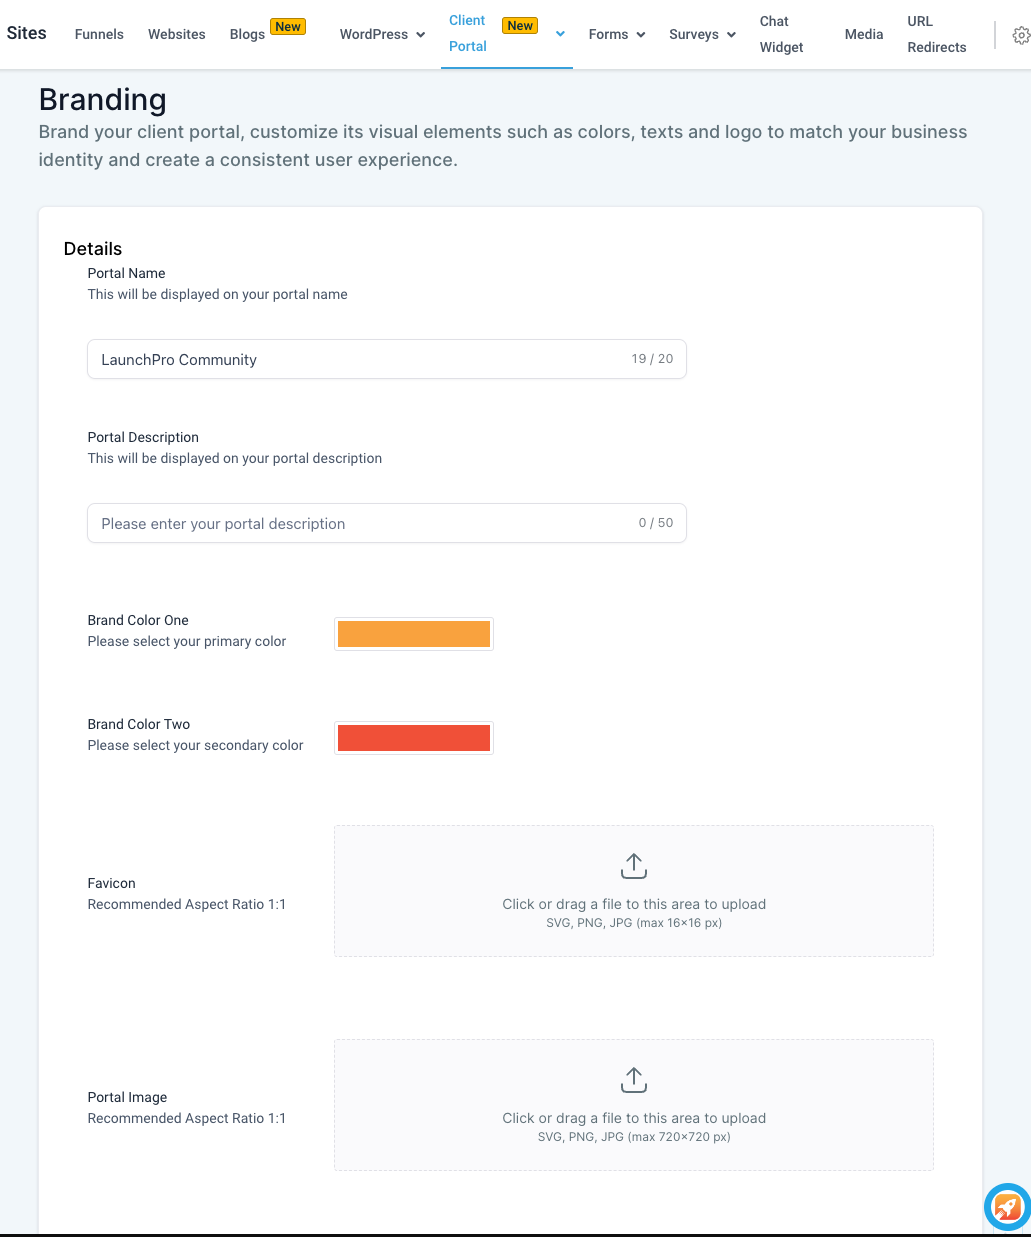
Under Sites → Client Portal → Branding - edit the branding of the Client portal page → Click Save Settings
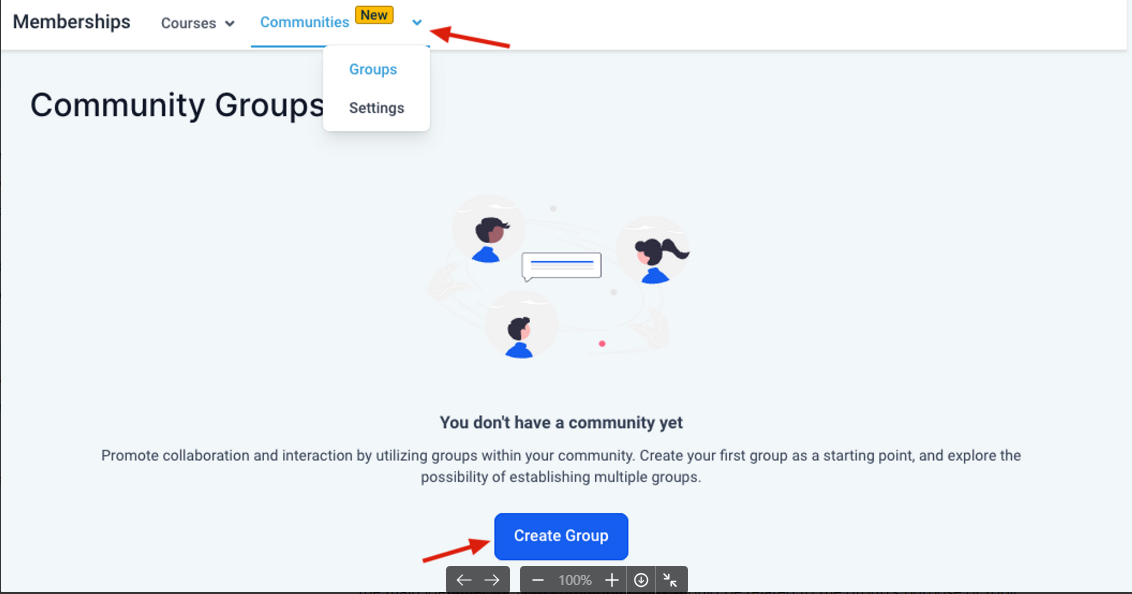
Set Up Groups
Go to Memberships → Communities → Groups → Create Group
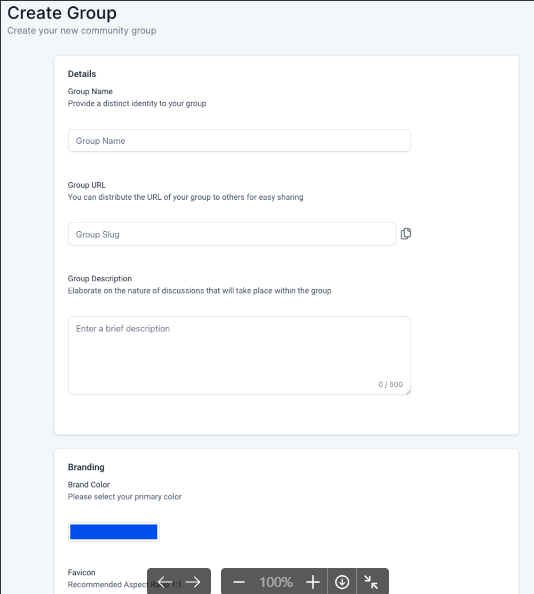
Fill out the necessary details (you can also change the branding color, logo, favicon and cover image) → Click Create Group
- Group Name: This field is where you provide a unique name for your group, which will serve as the main identifier for your community. This should be related to the group's purpose or topic. For example, if you're creating a group about digital marketing, you might name it "Digital Marketing Enthusiasts."
- Group URL (Group Slug): This is the unique web address where your group will be located. It should be easy to remember and share. Typically, it might be a simplified or abbreviated version of your group name, such as "digital-marketing," if your group name is "Digital Marketing Enthusiasts."
- Group Description: This section should briefly outline what your group is about, the kind of discussions that will take place, and what members can expect from being a part of the group. For instance, you might describe the Digital Marketing Enthusiasts group as "A community for digital marketing professionals and enthusiasts to share strategies, tools, and trends in the industry."
- Brand Color: Choose a color that represents your group or your brand. This color will be used in your group's design to provide a consistent look and feel.
- Favicon: This small icon will appear in the browser tab when someone is viewing your group. Ideally, It should be a small version of your logo or a symbol representing your group.
- Cover Image: The main image will appear at the top of your group's page. It should be visually appealing and relevant to your group's topic. The recommended aspect ratio is 16:9, and the image should be clear at a resolution of 200x200 pixels.
- Logo: This is the main logo for your group, which will appear in various places, such as the group switcher. It should ideally be square, with a 1:1 aspect ratio, and clear at a resolution of 200x200 pixels.
NOTE: The one who created the group will be the Owner.
Customizing your Groups
- Click Login
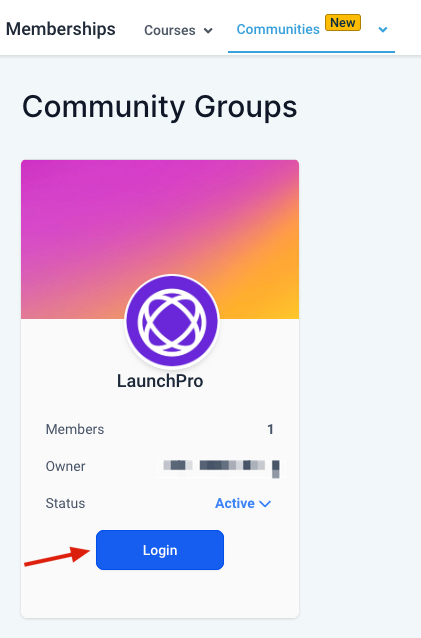
- Once you’re logged in to the group, click the Gear icon to see the Group Settings → Click Save
- Group URL: Customize the group's URL to make it more relevant or memorable for your audience. Each Community Group is initially assigned a default URL, but you can personalize it according to your preferences.
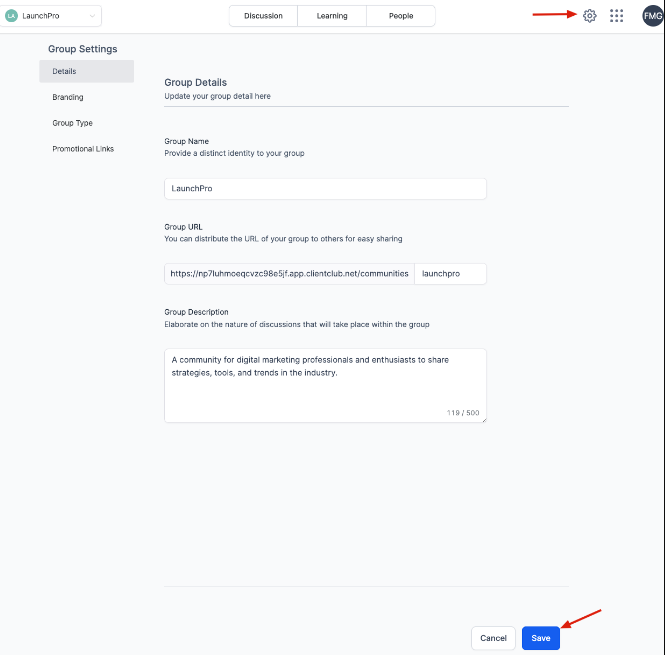
NOTE: You can only modify the group URL once, so it's crucial to double-check your desired URL before saving the changes.
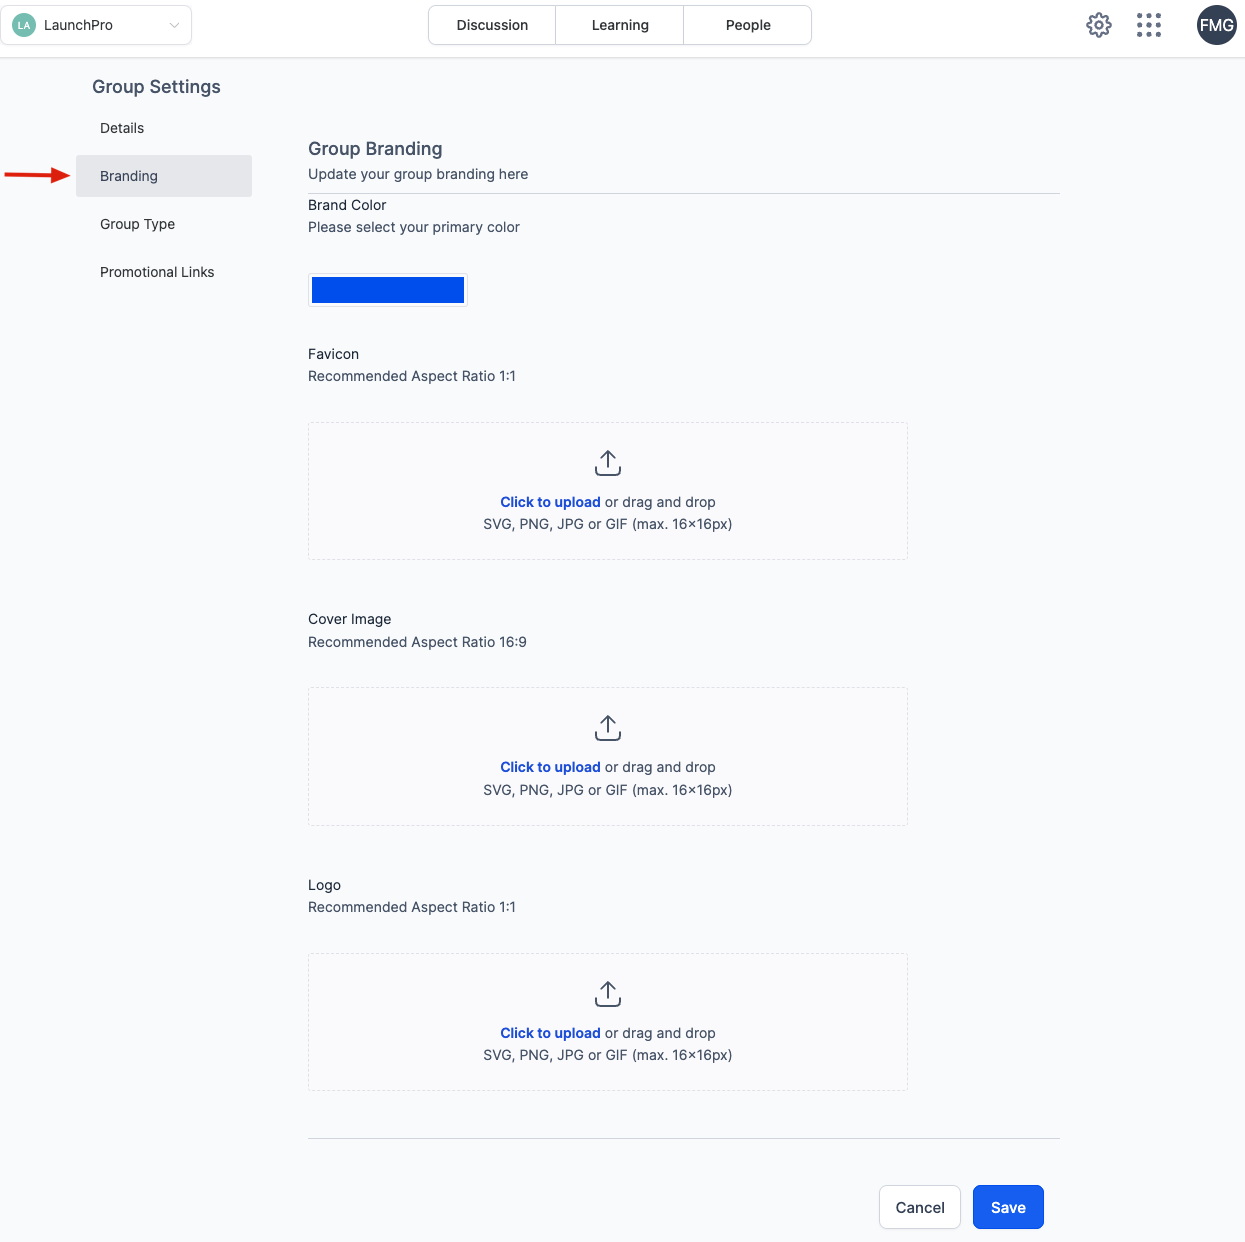
Branding
- Primary Color: Choose a color that mirrors your brand, providing consistency throughout the group.
- Group Logo: Upload a logo that will appear in the group switcher for easy identification.
- Cover Image: Add a visually appealing image that resonates with your group's theme or branding.
- Favicon: Include a small icon for browser tabs, reinforcing your group's visual identity.
Activate or Deactivate your groups
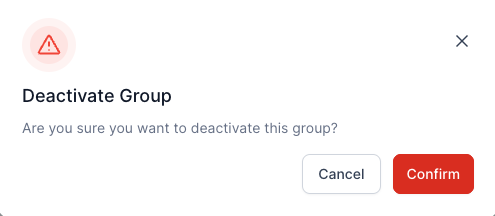
To deactivate a group, click the dropdown option on the status and select Inactive → Click Confirm
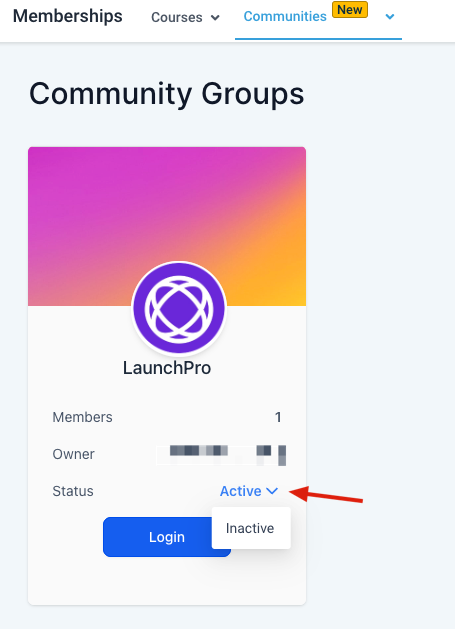
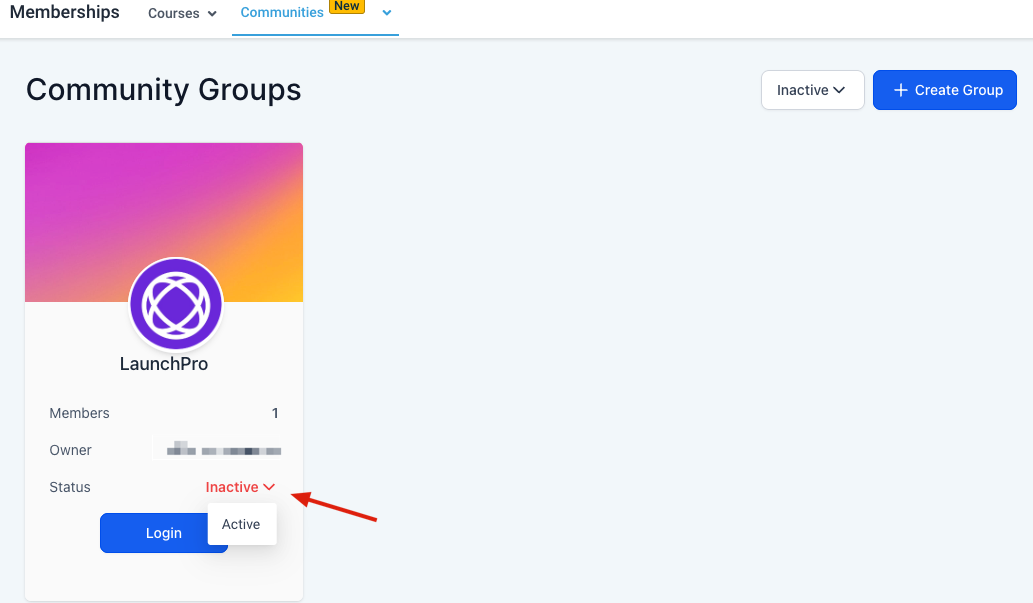
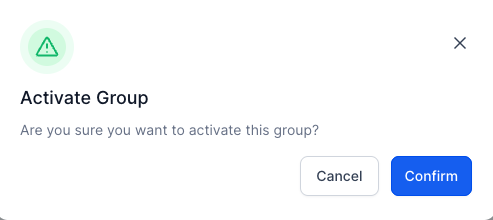
To set the group to active, change the filter to Inactive then change the status of the group to Active → Click Confirm

Was this article helpful?
That’s Great!
Thank you for your feedback
Sorry! We couldn't be helpful
Thank you for your feedback
Feedback sent
We appreciate your effort and will try to fix the article